Programs for creating 2d games without programming. Programs for creating games
Who doesn't like to play on a computer or smartphone? There are probably only a few such people.
For some gamers, their love for games goes so far that they begin to understand the entertainment itself and dream of creating games themselves. Well, today there are many opportunities to make this cherished dream come true!
If you want to create your own toy at your leisure, check out the list of special free programs for this.
Blender
 A free package of professional programs for creating interactive games and 3D computer graphics.
There are enough tools for work for both beginners and professionals. Blender contains tools for modeling, animation, video and sound processing.
The program is a full-fledged editor, which already contains the main textures, event handlers and models. If you need additional features, you can download plugins: they are created by both official developers and users.
But you will find lessons on working in this program.
Go ahead, create new universes!
Unity 3D
 This is a powerful environment for developing applications and games, including for mobile devices. Games created with Unity 3D run on Windows, iOS, Android, Playstation 3, Xbox 360 and Wii. You can create games of any genre; Textures and models are easily imported, and all popular image formats are supported.
Scripts are primarily written in JavaScript, but code can also be written in C#.
You will find training materials on working in the environment (in English) on the official website here.
Construct Classic
 Open source 2D and 3D game builder. No programming knowledge is required to operate. All you have to do is add an object and turn on the animation.
There is no Russian-language version, but the interface is very clear, so you can work even with basic knowledge of English.
The designer is not only free - it is open source, and if you wish, you can customize it and edit it as you wish.
You can watch Construct Classic lessons.
Game Maker Lite
 A free program for developing simple games of any genre: platform, puzzle, action and 3D games. Suitable for beginners. You can use your own images and effects, or built-in programs. To access a larger selection of images and effects, you need to register.
No programming knowledge is required to work, but some scripts can be written independently, if desired. So this program can also be used to teach programming.
Lessons on working in the program for beginners are on this site.
Unreal Development Kit
 Free engine for creating games. Very powerful, with tons of features and tools for advanced visualizations and detailed simulations. You can create games for many modern platforms.
The program already includes textures, models, sounds, sprites, and scripts. All that remains is to combine and create your own game.
Video tutorials and manuals for working with the program can be viewed.
Game Editor
 An editor for creating simple two-dimensional games for the operating systems Windows, iOS, Android, Linux.
There are built-in sets of animations that are responsible for the appearance of the characters. You can use your own graphic elements. The program also provides a standard set of reactions that determine the character’s behavior in the game. But you can also create your own, using the special scripting language Game Editor.
3D Rad
 Free program for developing 3D games and interactive applications. There is no need to use code, so creating your own games is quite simple.
The game is created by selecting various objects and setting up the interactions between them. There is a function for importing models, a large number of examples and samples. You can distribute finished games as a full-fledged web application or program. It is possible to embed games on web pages.
Game Maker: Studio
 A free set of tools for creating mobile games. A simple, intuitive interface that makes developing games quite simple. No programming knowledge is needed, since you don't have to write code manually.
There is nothing superfluous in the working window of the program. Games developed with Game Maker: Studio are cross-platform, and ready-made applications can be integrated with Steam.
NeoAxis 3D Engine
 A universal environment for developing 3D projects.
This is a ready-made engine with its own models, textures, physics, templates and graphics. There are even 24 ready-made, full-fledged cards!
It can be used to create not only games, but also single models and complex software visualizations.
All that remains is to turn on your imagination and create.
Are you itching to create your own game? No problem. Choose a program and go towards your dream!
Do you want to try creating your own 2D game? Here are the best tools for the job, even if you are new to this business.
Making games is difficult. The more you know about this process, the more amazed you will be that anyone actually follows through with it. As one of the former PC Gamer writers, Tom Francis, said when describing the process of programming the game Gunpoint: “While working on the game, I came to one conclusion: My game is pure madness. This is a patient of a mental hospital. She has completely lost her mind, and you need to be prepared for the fact that all reasonable arguments will be met with deranged screaming nonsense.”
It's easy to feel overwhelmed by the sheer amount of work that goes into designing and programming your game, but we asked several independent developers and they all gave the same advice to newbies: just do it. Plunge yourself into your work, no matter how scary it may seem. To help you take that first (daunting, but ultimately rewarding) step, we've prepared a list of 2D engines for aspiring game developers. We hope that it, along with the recommendations of experienced game designers, will be useful to you.
GameMaker Studio 2
License cost: $100 for PC version; free trial available
Suitable for: short 2D platformers and RPGs; cross-platform games
Examples of games: Nidhogg, Hyper Light Drifter, Undertale, Risk of Rain
pros
Mark Essen, author of the games Nidhogg and Nidhogg 2, says that GameMaker is great for beginners, since the system for creating scripts in it is as simple and clear as possible, and on the Yoyo Games portal you can find a collection of manuals and guides on this topic. There are also many add-ons for the engine on the Internet that allow you to customize it to create a top-down platformer or RPG.
Alex Preston, who created Hyper Light Drifter, says that the community of the GameMaker engine provides invaluable assistance to beginners. He notes that new developers should "...connect with the developer community and learn all the engine tools to get where they need to be - and to do this, it's worth seeking advice from seasoned developers."
Minuses
Of course, you are unlikely to be able to immediately create a game that can be published on Steam. "Because GameMaker is so easy to use, projects often end up unbalanced," says Essen. “I love that in the early stages of development you can quickly sketch out the skeleton of your game and focus on its design, but this can backfire later, especially if you don’t adhere to organizational standards!”
Duncan Drummond, author of the beloved Risk of Rain, also points out that GameMaker's ease of use can be a developer's nightmare. “You can quickly create a game with an engine, but if you overlook your mistakes in the early stages, then later this will result in increased costs for the game,” he says. Drummond notes that the specifics of working with GameMaker are very different from working with other engines, so if you plan to switch to Unity or any other engine in the future, you'll probably be better off looking elsewhere.
“Don't forget to delete your old works! The more often you start a game from scratch, the more experienced you become at game design." - Mark Essen, Nidhogg
“Just start! Start the engine, read the manuals and get to work, even if you can't really do it. The more mistakes you make, the more lessons you learn." - Alex Preston, Hyper Light Drifter
“Don't be afraid to start! It's an interesting and relatively simple way to develop, and it doesn't waste your time." - Duncan Drummond, Risk of Rain
Unity
License cost: Free Starter Pack, $35/month for Unity Plus, $125/month for Unity Pro
Suitable for: almost any indie game
Examples of games: , Galak-Z, West of Loathing, Cuphead
Unity is one of the premier platforms for developing popular indie games, and while it has impressive 3D capabilities, it has also produced some amazing 2D games. Unity is more difficult to learn than the other engines on this list, but the large developer community and the wealth of tutorials available online can help you get started.
On the official Unity website you can also find special add-ons that allow you to customize the engine for developing 2D games. For example, the free 2D Platformer extension or tools like Corgi Engine and Rex Engine, which offer game physics, controls and features tailored specifically for platformers.
We spoke with Joseph Humphrey from inkle and Victor Thompson from Asymmetric Publications, who talked about their experiences with Unity.
pros
Thompson, who had previously created games the classical way, quickly became a fan of Unity, the engine that was used to create the recently released West of Loathing. “After 2-3 years of working with the engine, what I'm most excited about is how quickly concepts and prototypes can be put together,” he says. “I've used a lot of different engines, both small ones for my own projects and large ones for developing AAA games, but Unity is by far the best engine I've seen because it allows me to be the most productive.”
Minuses
However, if you are going to use one platform for all your development, you will encounter certain limitations. If you find a bug in Unity, you will have to wait for the engine's authors to fix it, and this is not always fast. “Even though the engine says that bug fixing is their top priority, the inkle developers still consider debugging stability to be one of the engine's main problems,” says Humphrey.
“First of all, try to create an image of the end game in your head and focus on it - your end goal should not be the experience gained in the process, but the finished product. Of course, it's good to learn a lesson or two from failure, but I think it's much more important to set a goal, learn everything you need to do to achieve that goal, and ultimately make it happen." - Victor Thompson, West of Loathing
Ren'Py

License cost: For free
Suitable for: 2D visual novels, simulations
Compatible with: Python
Examples of games: Long Live the Queen, Analogue: A Hate Story
Ren'Py is an easy-to-learn open source engine. Although it requires basic programming skills, in the very early stages you will only need the ability to work with a word processor and photo editing applications. This is a convenient starting point for those who plan to learn the Python programming language in the future.
pros
“Ren’Py’s open source and cross-platform nature provides a wealth of capabilities for all users of the engine,” says Bensley. “I also think it’s a plus that the engine is designed for beginners, but at the same time requires making changes to the game’s program code. It's better than a graphical drag-and-drop interface because it shows that there's nothing scary about programming."
Ren’Py is for you if you are scared by the prospect of creating a game from scratch:
“One of the biggest obstacles that most people who have not worked in game development before is the belief that programming is “too hard” and therefore beyond their ability. And this engine allows you to quickly and successfully create a simple game, which gives confidence to novice developers, even if they do not plan to release only visual novels in the future. Once you create something that others can play, even a simple project, you no longer question your abilities.”
Minuses
Ren'Py is a bit limited in terms of graphics and gameplay features. If you intend to create games with 3D, Live2D, damage system and other features, then you should look for other options.
ink

License cost: For free
Suitable for: text adventure games
We are conscientious with: Unity, C#, HTML
Examples of games: 80 Days, Sorcery!
Ink is a good free add-on for Unity if you want to spice up your game with dialogue threads and expanded storytelling. It's easy to learn, doesn't use advanced code, and integrates seamlessly with Unity. As ink creator Joseph Humphrey says, this engine is an “intermediate” engine - after creating a script in ink, it can be transferred to a larger game using the Unity engine. However, the Inky Editor also allows you to create web games.
pros
Creating a large script with lots of dialogue threads can quickly become a confusing mess, so ink will help you avoid getting lost in the process. “Game authors can use the engine's tools to create dialogue and text in an easy-to-use interactive script format with key cues,” says Humphrey. “The ink engine, running inside Unity, can then read these scripts and output text to screens within the game itself.”
Open source plays an important role in the development of ambitious projects. Humphrey notes that “text generated in the ink engine does not necessarily need to be displayed as text. For example, in the game Heaven’s Vault, the ink engine creates a dynamic scenario that is interpreted by the game itself in the form of an interactive graphic novel with adventure elements.”
ink is also a great tool for those who are more interested in writing game scripts rather than pure programming. “...The number of writers using ink to write interactive stories is constantly growing,” adds Humphrey. “Where The Water Tastes Like Wine is one such example. It was created by the authors of the game Gone Home using the ink engine. Such famous screenwriters as Lee Alexander, Emily Short and Kara Ellison worked on the game. So if you enjoy writing scripts and are interested in game development, then ink could be a great place to start.”
Minuses
ink is best used for games developed using the Unity engine. Humphrey says that "ink is not an alternative to Unity - it's more of an add-on. Moreover, ink is the only interactive scripting tool that was intentionally built as an intermediate."
“The only advice I have is to just try to create a demo game. If you want to fill out your portfolio, which shows examples of what you are good at, then now is the time to start filling it out. Create these examples!”

At the beginning of 2017, we wrote about the sudden appearance of RPG Maker on the Steam platform and how the engine was rapidly gaining popularity among aspiring indie developers. But there are other tools that are worth paying attention to:
HaxeFlixel open source and cross-platform.
Stencyl– a tool for creating games without using programming.
Construct- free, based on DirectX9, a game builder for Windows designed for creating 2D games. It uses a convenient and simple event-based system. With it, you can easily create the rules by which your game will work.
You don't need to be able to program or know scripts - nothing at all! Construct clear for beginners and powerful enough for professionals. If you are disappointed with complex logic circuits in other programs - try it Construct. It's easier than it looks!
Construct is not a commercial program and is developed by volunteers. Right now you can download the full-featured version of the program for free without any annoying windows, ads or restrictions. The fully functional version of the program is absolutely free!
Myself Construct distributed under GPL license. However, this license does not apply to any works created in the program. You can distribute and sell your works (games, programs, etc.) created using Construct, and also release them as closed source.
Indie game designers, artists or simply amateurs can use Construct to quickly and easily create your own virtual worlds without programming. Teachers and students can use Construct to learn the principles of logic in a fun way. Developers can use the program to quickly create wireframes and prototypes, or simply as an alternative, faster way to code. Whoever you are Construct has many features to help you solve your problem.
Below is a general description of the main features of the program. Construct.
Interface
Program interface Construct has many different tabs that provide quick access to a wide range of tools. The interface is fully customizable, so you can reorganize it as you wish.
It includes a project control panel, a layers tab, an animation tab, and a properties panel. These panels can be detached and attached in any place convenient for you, changed their size and enabled automatic hiding.
The level editor is completely visual, built on the WYSIWYG principle, which makes the process of creating game levels simple and fun. You can view the effects you've added in real time, rotate and resize objects, and change project settings in the panel Properties.
The program also has a built-in one that allows you to create sprites, icons and textures for objects in the level. Objects can be placed on different layers, which allows you to create a parallax effect and improve the organization of levels.
Event Lists
 Events in Construct are a list of logical blocks that consist of conditions and actions that in turn determine how exactly your game should work. You don't need to use or learn any programming languages, scripts, etc. to make a full-fledged game. Events in Construct are a very powerful tool that is capable of creating absolutely any game without a single line of programming, which is especially suitable for beginners. But even experienced programmers can get results much faster compared to traditional programming.
Events are created by selecting possible conditions. It's very simple! For example, you create a condition - when my character touched a gold coin. Now you choose an action for this condition, for example, take a coin and add 1000 points to your character! The list of events is designed to be as clear and intuitive as possible so that you can get instant results without effort. Entire lists of events can be easily grouped, copied, moved, and even used in other levels, saving you the hassle of constantly recreating events for each level.
You can try it right now, in just 5 minutes and see for yourself how easy it is to work in the program Construct.
Objects and Behaviors
 Construct includes over 60 objects and 20 built-in behaviors. Using objects you create sprites, control the game, play music, sounds, create particle effects, and much more.
Architecture of objects Construct gives the opportunity to any interested C++ developer, using the SDK, to write and use them as objects in Construct, which allows you to limitlessly expand the capabilities of the program.
 Behaviors instantly expand the capabilities of objects. For example, by adding the behavior to a sprite Platform you can immediately control it by running and jumping around the level. You can easily change running speed, jump strength, etc., which allows you to completely customize the behavior of your character or any other object in the game. Behaviors save time because they save you from having to re-create events for the same tasks. For example, behavior Fade allows any objects to automatically disappear or appear in your game level. Behaviors also allow you to control enemies, create realistic physics simulations, and much more.
Effects and visualization
 When you run the game you created, the rendering occurs using DirectX9 with hardware acceleration, which gives optimal performance through the use of a video card, and allows the use of pixel shaders.
IN Construct available more than 50 effects, with which you can create distortion, mixing, blur, wave and lens effects, masks and much more. You can apply effects to specific objects or even to an entire level. Each effect has flexible settings, allowing you to quickly and easily create beautiful and impressive special effects.
 Christmas Puzzle Game. New Year's adventure in a logic puzzle of the Match-3 genre from Mary Jane. In the allotted amount of time, you have to break all the chips by putting them 3 or more in a row. Stunning graphics and sound will keep you glued to your screen for a long time. The game has only 3 levels, at the end of which you will see a beautiful and cool screensaver!
 Project Star. A classic arcade shooter where you control a small spaceship. The game has only 1 level, in which you have to fight with 5 types of opponents. The game is made very effectively and dynamically, not allowing the player to relax, and the soundtrack immerses you even more in the atmosphere of the game.
 Big Boom. The most dangerous gangster-subversive is spending his time in the central prison of the city “N”. He should have lived happily ever after, but for his next birthday, the gangster receives a cake with a chocolate bomb on top of his head. The stupid guards didn't even realize there was a real bomb inside the cake! After eating the cake, the bandit took the bomb and...
 Pirates. A sea adventure in the Arkanoid genre. You control a boat whose task is to destroy pirate ships. With each level the game becomes more difficult and the enemy behaves more aggressively. By destroying ships, you earn coins and bonuses. The game has 4 bright and dynamic levels, after completing which you will see a beautiful screensaver!
Community
On our forum there is a whole community of enthusiastic users who, with the help of Construct create their own unique works and share them with other participants. You can also join and show us your creation. On our forum you can get technical support and learn about new program releases Construct, read user lessons, find like-minded people to work on joint projects and learn a lot of useful information about the program.
You can visit our page where we publish all the latest news about the program Construct, and go to our video channel YouTube to watch educational videos, game demos and examples.
For now Construct is under development, so you can help make it better by reporting any problems you encounter while using the program so that the developers know about them and can fix them.
Please report any bugs to the official (website in English).
On this tracker you can track the entire history of errors and store it centrally so as not to forget about any changes made. To report a bug, you need to create an account on . If you are a registered user, developers can easily contact you if additional information about a bug is needed.
Attention: error messages on the SourceForge.net tracker must be published exclusively in English!
Developers Construct use the information you provide to correct the error you found. Often bug reports do not provide enough information for developers to resolve the issue. That's why It is very important that your bug report contains the following points:
- Be sure to add to your error message .cap file in which there is a problem. It should be as simple as possible so that you can quickly find and understand the nature of the error.
- Also write to your .cap file step by step guide on how to cause this problem so that developers can follow your actions and see what you saw when the error occurred.
- Specify version of Construct, which you are using, and, if possible, the characteristics of your video card (especially important when solving graphics and rendering problems).
For an example of a good bug report, look at behavior Platform (website in English).
Probably everyone who has played computer games has at least once thought about creating their own game and retreated from the difficulties ahead. But a game can be created quite simply if you have a special program in hand, and you do not always need knowledge of programming languages to use such programs. On the Internet you can find many game designers for both beginners and professionals.
If you decide to start creating games, then you definitely need to find yourself development software. We have selected programs for you to create games without programming.

Game Maker is a simple designer program for creating 2D and 3D games, allowing you to create games for a large number of platforms: Windows, iOS, Linux, Android, Xbox One and others. But the game will need to be configured for each OS, since Game Maker does not guarantee the game will work the same everywhere.
The advantage of the constructor is that it has a low entry barrier. This means that if you have never developed games, then you can safely download Game Maker - it does not require any special programming knowledge.
You can create games using a visual programming system or using the built-in GML programming language. We advise you to study GML, as with its help games come out much more interesting and of higher quality.
The process of creating games here is very simple: creating sprites in the editor (you can upload ready-made drawings), creating objects with different properties and creating levels (rooms) in the editor. The speed of game development on Game Maker is much faster than on other similar engines.
Unity 3D

One of the most powerful and most popular game engines is Unity 3D. With its help, you can create games of any complexity and any genre, using the same visual programming interface. Although initially creating full-fledged games on Unity3D implied knowledge of programming languages such as JavaScript or C#, they are needed for larger-scale projects.
The engine will provide you with a lot of possibilities, you just need to learn how to use it. To do this, you will find tons of training material on the Internet. And the program itself helps the user in every possible way in his creativity.
Cross-platform, stability, high performance, user-friendly interface - this is just a small list of the advantages of the Unity 3D engine. Here you can create almost anything: from Tetris to GTA 5. But the program is best suited for indie game developers.
If you decide to list your game on the PlayMarket for something other than free, you will have to pay the Unity 3D developers a certain percentage of sales. And for non-commercial use the program is free.
And back to the designers again! Clickteam Fusion is a program for creating 2D games using a drag'n'drop interface. Here you don't need programming, because you will assemble games piece by piece, like a construction set. But you can also create games by writing code for each object.
With this program you can create games of any complexity and any genre, preferably with a static image. Also, the created game can be launched on any device: computer, phone, PDA, etc.
Despite the simplicity of the program, Clickteam Fusion has a large number of diverse and interesting tools. There is a testing mode in which you can check the game for errors.
Clickteam Fusion is not expensive compared to other programs, and you can also download a free demo version on the official website. Unfortunately, the program is not suitable for large games, but for small arcades it is just right.

Another very good program for creating two-dimensional games is Construct 2. Using visual programming, you can create games for various popular and not so popular platforms.
Thanks to its simple and intuitive interface, the program is suitable even for those users who have never dealt with game development. Also, beginners will find many tutorials and examples of games in the program, with a detailed explanation of all processes.
In addition to standard sets of plugins, behaviors and visual effects, you can add them yourself by downloading from the Internet or, if you are an experienced user, write plugins, behaviors and effects in JavaScript.
But where there are pros, there are also cons. The main disadvantage of Construct 2 is that export to additional platforms is carried out only using third-party programs.
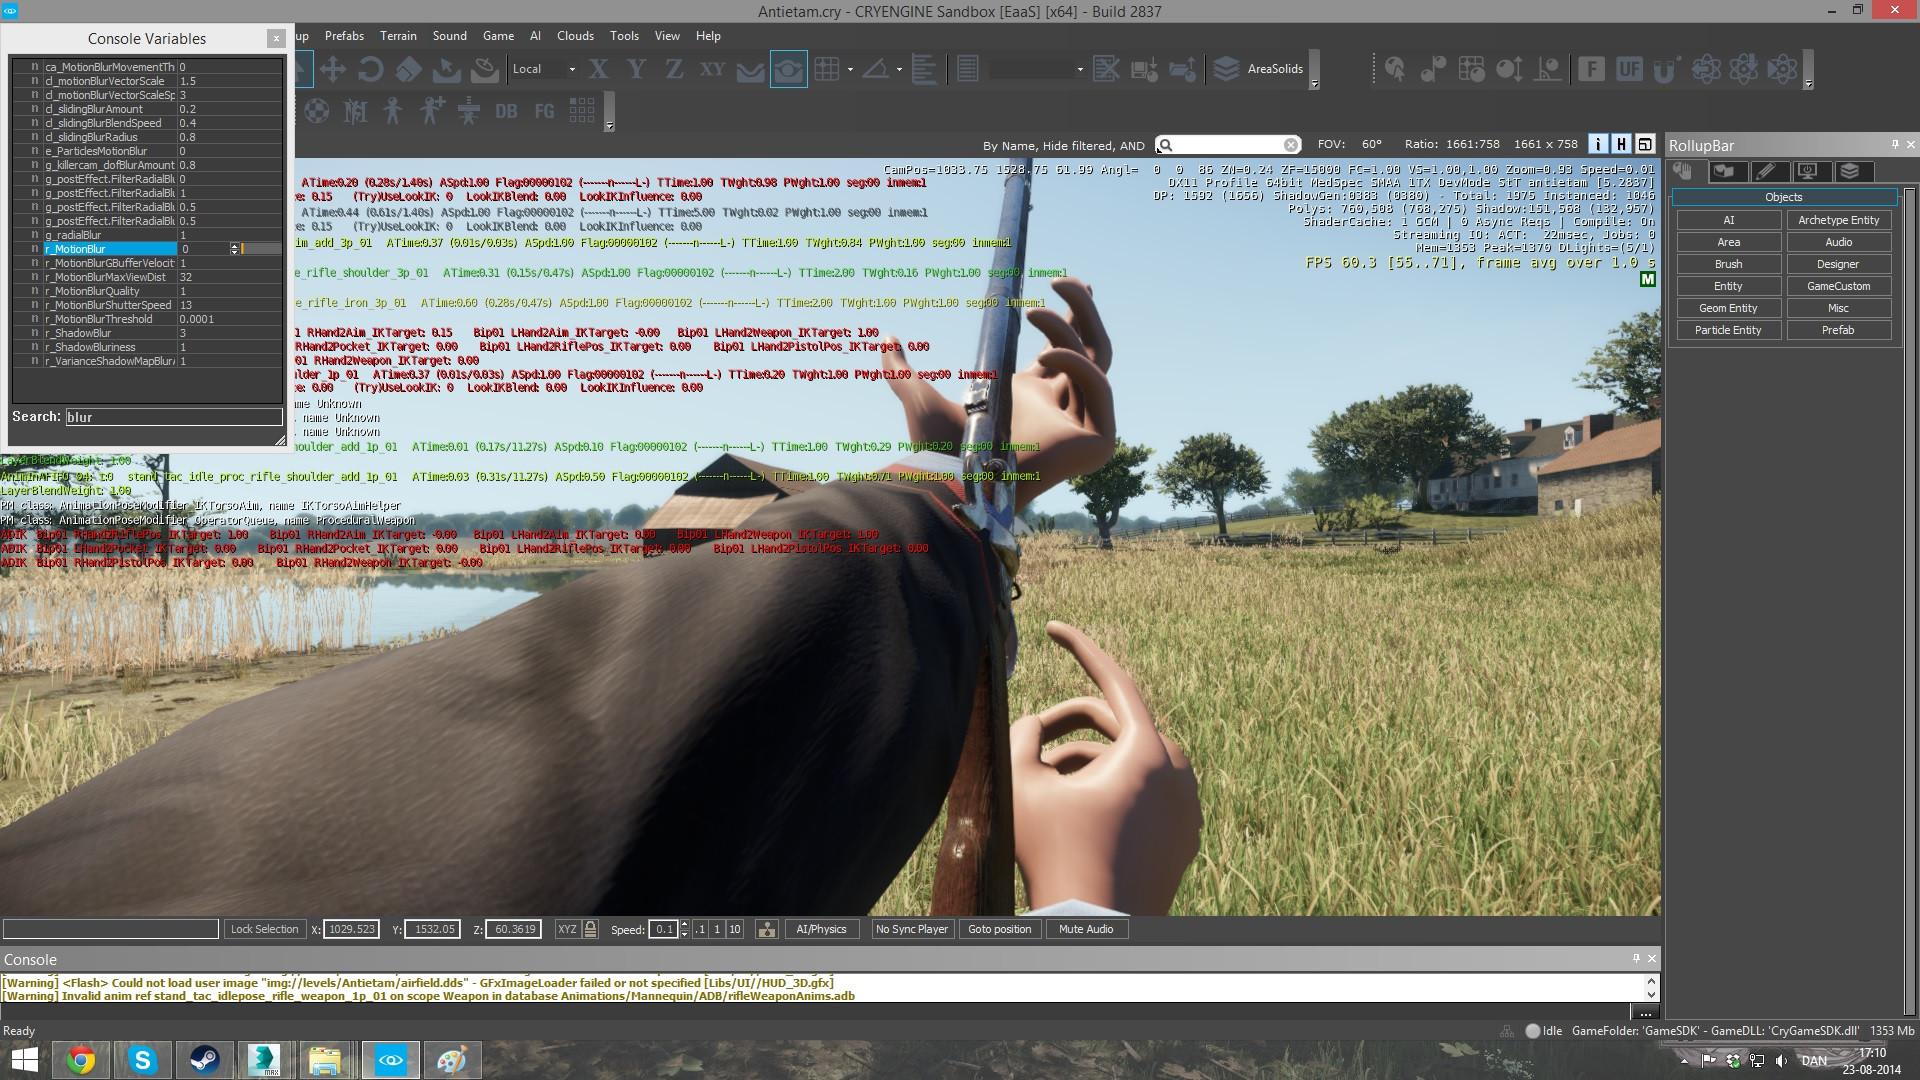
CryEngine is one of the most powerful engines for creating 3D games, the graphical capabilities of which surpass all similar programs. It was here that such famous games as Crysis and Far Cry were created. And all this is possible without programming.
Here you will find a very large set of tools for game development, as well as tools that designers need. You can quickly create sketches of models in the editor, or you can immediately on location.
The physics system in EdgeEngin supports inverse kinematics of characters, vehicles, physics of hard and soft bodies, liquids, and tissues. So the objects in your game will behave quite realistically.
CryEngine is, of course, very cool, but the price for this software is corresponding. You can check out the trial version of the program on the official website, but only advanced users who can cover the cost of the software should buy it.

Game Editor is another game builder on our list that is similar to a simplified Game Maker. Here you can create simple 2D games without any special programming knowledge.
Here you will only work with actors. These can be both characters and “interior” items. Each actor can have many different properties and functions. You can also write actions in the form of code, or you can simply select a ready-made script.
Also, using Game Editor you can create games for both computers and phones. To do this, simply save the game in the correct format.
Unfortunately, you are unlikely to create a large project using Game Editor, as it will take a lot of time and effort. Another disadvantage is that the developers abandoned their project and no updates are expected yet.
And here is a competitor for Unity 3D and CryEngin - Unreal Development Kit. This is another powerful game engine for developing 3D games for many popular platforms. Games here, too, can be created without using programming languages, but simply by assigning ready-made events to objects.
Despite the complexity of mastering the program, Unreal Development Kit gives you great opportunities for creating games. We advise you to learn how to use them all. Fortunately, you will find plenty of materials on the Internet.
For non-commercial use, you can download the program for free. But as soon as you start receiving money for the game, you need to pay interest to the developers, depending on the amount received.
The Unreal Development Kit project does not stand still and the developers regularly post additions and updates. Also, if you have any problems while working with the program, you can contact the support service on the official website and they will definitely help you.

Kodu Game Lab is probably the best choice for those starting to get into 3D game development. Thanks to the colorful and clear interface, creating games in this program is interesting and not at all difficult. In general, this project was developed for teaching schoolchildren, but still it will be useful even for adults.
The program is very good at helping you understand how games are created and what they are. By the way, to create a game you don’t even need a keyboard - everything can be done with just a mouse. There is no need to write code here, you just need to click on objects and events.
A special feature of Code Game Lab is that it is a free program in Russian. And this, mind you, is very rare among serious game development programs. There is also a lot of educational material, done in an interesting form of quests.
But no matter how good the program is, there are also disadvantages. Kodu Game Lab is simple, yes. But it doesn’t have as many tools as we would like. This development environment is also quite demanding on system resources.

3D Rad is a rather interesting program for creating 3D games for your computer. As with all the programs mentioned above, it uses a visual programming interface, which will please novice developers. Over time, you will learn how to create scripts in this program.
This is one of the few programs that is free even for commercial use. Almost all game engines either need to be purchased or a percentage of the income must be deducted. In 3D Rad you can create a game of any genre and make money from it.
Interestingly, in 3D Rad you can create a multiplayer game or a network game and even set up a game chat. This is another interesting feature of this program.
The designer also pleases us with the quality of visualization and physics engine. You can customize the behavior of hard and soft bodies, and also force ready-made 3D models to obey the laws of physics by adding springs, joints, etc. to them.

With the help of another interesting and colorful program - Stencyl, you can create bright and colorful games for many popular platforms. The program has no genre restrictions, so here you can bring all your ideas to life.
Stencyl is not just an application development software, but a set of tools that makes the work of creating an application easier, allowing you to focus on what matters most. In this case, there is no need to write the code yourself - all you need is to move the blocks with the code, thus changing the behavior of the main characters of your application.
Of course, the free version of the program is quite limited, but it is still enough to create a small and interesting game. You will also find a lot of educational material, as well as the official wiki encyclopedia - Stencylpedia.
This is just a small part of all existing programs for creating games. Almost all of the programs on this list are paid, but you can always download a trial version and decide if it's worth the money. We hope you find something for yourself here and we can see the games you create soon.
This tutorial is intended primarily for those new to Android development, but it may also be useful for more experienced developers. Here we tell you how to create a simple 2D game on Android without using any game engines. I used Android Studio for this, but any other appropriately configured development environment can be used.
Step 1. Come up with a game idea
For example, let's take a fairly simple idea:
At the bottom of the screen is a spaceship. It can move left and right by pressing the corresponding buttons. Asteroids move vertically downwards from above. They appear across the entire width of the screen and move at different speeds. The ship must dodge meteorites as long as possible. If a meteorite hits it, it's game over.
Step 2. Create a project
In Android Studio, select File > New > New Project from the top menu.

Here we enter the application name, domain and path. Click Next.

Here you can enter the android version. You can also choose an Android watch and TV. But I'm not sure that our application will work on all this. So it’s better to enter everything as in the screenshot. Click Next.

Here we must select Empty Activity. And click Next.

Here we leave everything as is and click Finish. So the project has been created. Let's move on to the third step.
Step 3. Add pictures
Step 5. Edit the MainActivity class
First of all, add implements View.OnTouchListener to the class definition. The class definition will now be like this:
Public class MainActivity extends AppCompatActivity implements View.OnTouchListener (
Let's add the static variables (class variables) we need to the class:
Public static boolean isLeftPressed = false; // left button pressed public static boolean isRightPressed = false; // right button pressed
In the procedure protected void onCreate(Bundle savedInstanceState) (
add the lines:
GameView gameView = new GameView(this); // create gameView LinearLayout gameLayout = (LinearLayout) findViewById(R.id.gameLayout); // find gameLayout gameLayout.addView(gameView); // and add gameView Button to it leftButton = (Button) findViewById(R.id.leftButton); // find the buttons Button rightButton = (Button) findViewById(R.id.rightButton); leftButton.setOnTouchListener(this); // and add this class as a listener (onTouch will work when pressed) rightButton.setOnTouchListener(this);
Classes LinearLayout, Button, etc. are highlighted in red because they have not yet been added to Import.
To add and remove red highlighting to Import, you need to press Alt+Enter for each.
The GameView will be highlighted in red because this class does not exist yet. We'll create it later.
Now we add the procedure:
Public boolean onTouch(View button, MotionEvent motion) ( switch(button.getId()) ( // determine which button case R.id.leftButton: switch (motion.getAction()) ( // determine whether it is pressed or released case MotionEvent. ACTION_DOWN: isLeftPressed = true; break; case MotionEvent.ACTION_UP: isLeftPressed = false; break; ) break; case R.id.rightButton: switch (motion.getAction()) ( // determine whether it is pressed or released case MotionEvent.ACTION_DOWN: isRightPressed = true; break; case MotionEvent.ACTION_UP: isRightPressed = false; break; ) break; ) return true; )
If anyone is confused? This is what the resulting MainActivity class should look like:
Package com.spaceavoider.spaceavoider; import android.support.v7.app.AppCompatActivity; import android.os.Bundle; import android.view.MotionEvent; import android.view.View; import android.widget.Button; import android.widget.LinearLayout; public class MainActivity extends AppCompatActivity implements View.OnTouchListener ( public static boolean isLeftPressed = false; // left button is pressed public static boolean isRightPressed = false; // right button is pressed @Override protected void onCreate(Bundle savedInstanceState) ( super.onCreate(savedInstanceState) ; setContentView(R.layout.activity_main); GameView gameView = new GameView(this); // create gameView LinearLayout gameLayout = (LinearLayout) findViewById(R.id.gameLayout); // find gameLayout gameLayout.addView(gameView); / / and add gameView Button leftButton = (Button) findViewById(R.id.leftButton); // find the buttons Button rightButton = (Button) findViewById(R.id.rightButton); leftButton.setOnTouchListener(this); // and add this class as a listener (when pressed, onTouch will work) rightButton.setOnTouchListener(this); ) public boolean onTouch(View button, MotionEvent motion) ( switch(button.getId()) ( // determine which button case R.id.leftButton : switch (motion.getAction()) ( // determine whether pressed or released case MotionEvent.ACTION_DOWN: isLeftPressed = true; break; case MotionEvent.ACTION_UP: isLeftPressed = false; break; ) break; case R.id.rightButton: switch (motion.getAction()) ( // determine whether it is pressed or released case MotionEvent.ACTION_DOWN: isRightPressed = true; break; case MotionEvent.ACTION_UP: isRightPressed = false; break; ) break; ) return true; ) )
So, the MainActivity class is ready! It initiates the not yet created GameView class. And when the left button is pressed, the static variable isLeftPressed = true, and when the right button is pressed, isRightPressed = true. That's basically all he does.
First, let's make sure that the spaceship is displayed on the screen and that it moves when the control buttons are pressed. We'll leave the asteroids for later.
Step 6. Create the GameView class
Now let's finally create that missing GameView class. So let's get started. Let's add extends SurfaceView implements Runnable to the class definition. Mobile devices have different screen resolutions. It could be an old small phone with a resolution of 480x800, or a large tablet with a resolution of 1800x2560. In order for the game to look the same on all devices, I divided the screen into 20 parts horizontally and 28 vertically. I called the resulting unit of measurement a unit. You can choose other numbers. The main thing is that the relationship between them is approximately preserved, otherwise the image will be elongated or compressed.
Public static int maxX = 20; // horizontal size public static int maxY = 28; // vertical size public static float unitW = 0; // pixels per unit horizontally public static float unitH = 0; // pixels per unit vertically
We will calculate unitW and unitW later. We will also need other variables:
Private boolean firstTime = true; private boolean gameRunning = true; private Ship ship; private Thread gameThread = null; private Paint paint; private Canvas canvas; private SurfaceHolder surfaceHolder;
The constructor will be like this:
Public GameView(Context context) ( super(context); //initialize objects for drawing surfaceHolder = getHolder(); paint = new Paint(); //initialize the thread gameThread = new Thread(this); gameThread.start(); )
The run() method will contain an infinite loop. At the beginning of the loop, the update() method is executed
which will calculate the new coordinates of the ship. Then the draw() method draws the ship on the screen. And at the end, the control() method will pause for 17 milliseconds. After 17 milliseconds, run() will run again. And so on until the variable gameRunning == true. These are the methods:
@Override public void run() ( while (gameRunning) ( update(); draw(); control(); ) ) private void update() ( if(!firstTime) ( ship.update(); ) ) private void draw () ( if (surfaceHolder.getSurface().isValid()) ( //check if the surface is valid if(firstTime)( // initialization on first launch firstTime = false; unitW = surfaceHolder.getSurfaceFrame().width()/maxX ; // calculate the number of pixels in the unit unitH = surfaceHolder.getSurfaceFrame().height()/maxY; ship = new Ship(getContext()); // add a ship ) canvas = surfaceHolder.lockCanvas(); // close the canvas canvas .drawColor(Color.BLACK); // fill the background with black ship.drow(paint, canvas); // draw the ship surfaceHolder.unlockCanvasAndPost(canvas); // open the canvas ) ) private void control() ( // pause for 17 milliseconds try ( gameThread.sleep(17); ) catch (InterruptedException e) ( e.printStackTrace(); ) )
Pay attention to the initialization when you first start. There we calculate the number of pixels in the unit and add the ship. We haven't created the ship yet. But first we will create its parent class.
Step 7. Create the SpaceBody class
It will be the parent of the Ship and Asteroid classes. It will contain all the variables and methods common to these two classes. Adding variables:
Protected float x; // coordinates protected float y; protected float size; // size protected float speed; // speed protected int bitmapId; // picture id protected Bitmap bitmap; // picture
and methods
Void init(Context context) ( // compress the image to the required size Bitmap cBitmap = BitmapFactory.decodeResource(context.getResources(), bitmapId); bitmap = Bitmap.createScaledBitmap(cBitmap, (int)(size * GameView.unitW), ( int)(size * GameView.unitH), false); cBitmap.recycle(); ) void update())( // new coordinates will be calculated here ) void drow(Paint paint, Canvas canvas)( // draw a picture canvas.drawBitmap (bitmap, x*GameView.unitW, y*GameView.unitH, paint); )
Step 8. Create the Ship class
Now let's create the Ship class. It inherits the SpaceBody class, so we’ll add extends SpaceBody to the class definition.
Let's write a constructor:
Public Ship(Context context) ( bitmapId = R.drawable.ship; // define the initial parameters size = 5; x=7; y=GameView.maxY - size - 1; speed = (float) 0.2; init(context); // initialize the ship)
and override the update() method
@Override public void update() ( // move the ship depending on the button pressed if(MainActivity.isLeftPressed && x >= 0)( x -= speed; ) if(MainActivity.isRightPressed && x<= GameView.maxX - 5){
x += speed;
}
}
With this, the spaceship is ready! We compile everything and run it. A spaceship should appear on the screen. When you press the buttons it should move left and right. Now we add the asteroids falling from above. If you collide with a ship, the game ends.
Step 9. Create the Asteroid class
Let's add the Asteroid class. It also inherits the SpaceBody class, so we’ll add extends SpaceBody to the class definition.
Let's add the variables we need:
Private int radius = 2; // radius private float minSpeed = (float) 0.1; // minimum speed private float maxSpeed = (float) 0.5; // maximum speed
The asteroid should appear at a random point at the top of the screen and fly down at a random speed. To do this, x and speed are specified using a random number generator in its constructor.
Public Asteroid(Context context) ( Random random = new Random(); bitmapId = R.drawable.asteroid; y=0; x = random.nextInt(GameView.maxX) - radius; size = radius*2; speed = minSpeed + (maxSpeed - minSpeed) * random.nextFloat(); init(context); )
The asteroid must move vertically downward at a certain speed. Therefore, in the update() method we add speed to the x coordinate.
@Override public void update() ( y += speed; )
We will also need a method to determine whether an asteroid collided with a ship.
Public boolean isCollision(float shipX, float shipY, float shipSize) ( return !(((x+size)< shipX)||(x >(shipX+shipSize))||((y+size)< shipY)||(y >(shipY+shipSize))); )
Let's take a closer look at it. For simplicity, we consider the ship and the asteroid to be squares. Here I went from the opposite. That is, I determine when the squares DO NOT intersect.
((x+size)< shipX) - корабль слева от астероида.
(x > (shipX+shipSize)) - the ship to the right of the asteroid.
((y+size)< shipY) - корабль сверху астероида.
(y > (shipY+shipSize)) - ship from below the asteroid.
Between these four expressions is || (or). That is, if at least one expression is true (which means that the squares do NOT intersect), the resulting ones are also true.
I invert this entire expression with the sign!. As a result, the method returns true when the squares intersect. Which is exactly what we need.
You can read about determining the intersection of more complex figures.
Step 10. Add asteroids to GameView
Add variables to GameView:
Private ArrayList
We also add 2 methods:
Private void checkCollision())( // go through all the asteroids and check if one of them touches the ship for (Asteroid asteroid: asteroids) ( if(asteroid.isCollision(ship.x, ship.y, ship.size))( // the player lost gameRunning = false; // stop the game // TODO add explosion animation ) ) ) private void checkIfNewAsteroid())( // every 50 iterations add a new asteroid if(currentTime >= ASTEROID_INTERVAL)( Asteroid asteroid = new Asteroid(getContext() ); asteroids.add(asteroid); currentTime = 0; )else( currentTime ++; ) )
And in the run() method we add calls to these methods before the control() call.
@Override public void run() ( while (gameRunning) ( update(); draw(); checkCollision(); checkIfNewAsteroid(); control(); ) )
Next, in the update() method, we add a loop that iterates through all the asteroids and calls the update() method on them.
Private void update() ( if(!firstTime) ( ship.update(); for (Asteroid asteroid: asteroids) ( asteroid.update(); ) ) )
We add the same loop to the draw() method.
Private void draw() ( if (surfaceHolder.getSurface().isValid()) ( //check if the surface is valid if(firstTime)( // initialization on first launch firstTime = false; unitW = surfaceHolder.getSurfaceFrame().width( )/maxX; // calculate the number of pixels in the unit unitH = surfaceHolder.getSurfaceFrame().height()/maxY; ship = new Ship(getContext()); // add a ship ) canvas = surfaceHolder.lockCanvas(); // close the canvas canvas.drawColor(Color.BLACK); // fill the background with black ship.drow(paint, canvas); // draw the ship for(Asteroid asteroid: asteroids)( // draw the asteroids asteroid.drow(paint, canvas); ) surfaceHolder.unlockCanvasAndPost(canvas); // open canvas ) )
That's all! The simplest 2D game is ready. Let's compile, run and see what happens!
If anyone is confused or something doesn’t work, you can download the source.
The game is, of course, primitive. But it can be improved by adding new functions. First of all, you should implement the removal of asteroids that have flown off the screen. You can make the ship able to shoot at asteroids, so that the game gradually speeds up, add a timer, a table of records, etc. If this is interesting to you, I will write a sequel where I will describe all this.
That's all. Write reviews, questions, topics that interest you to continue.