How to make a firebird from leaves. Crafts from autumn leaves with preschoolers
Master class “Firebird” made from natural material in three versions. Master class with step-by-step photos
Petrova Olesya, 12 years old, student of the “Phyto-design” mug.Supervisor: Gorina Svetlana Valentinovna, additional education teacher,
MKUDO Surovikino House of Pioneers and Schoolchildren.
Autumn is a wonderful time of year, when the foliage on the trees changes color, the fruits ripen, and the seeds ripen. It’s nice to go on an excursion to the forest in clear weather, where you can pick leaves of different shapes and colors for future compositions.
In this master class I demonstrate three versions of the Firebird compositions.
This master class is intended for children of primary and secondary school age, teachers and parents.
Purpose: interior decoration, gift.
Target: production of a composition from natural material in the form of a panel “Firebirds”.
Tasks:
- develop perseverance,
- develop creativity, fantasy, imagination.
“Firebird” from ash seeds. Master class with step-by-step photos
The seeds of the ash tree are in the form of lionfish, very convenient for making crafts, they are stored well, and can be used in winter.

- ash lionfish,
- millet,
- chickpeas,
- mash,
- colored cardboard,
- scissors,
- gouache,
- PVA glue,
- brush.

Let’s draw “Firebird” on colored cardboard.

Let's color the lionfish blue.

Let's put green dots on the blue lionfish.

Glue the painted lionfish onto the “Firebirds” outline. Glue without gaps, lionfish tightly to each other.

Glue the next row, covering the previous one.

In this way we glue the tail completely.

Cover the body of the bird with blue winged wings.

We will cover the entire body of the bird with lionfish without a gap in blue.

We continue to cover the neck with blue lionfish. Break the unpainted lionfish in half and glue the beak.

Cut the blue lionfish in half. Glue the head in flat pieces in a circle.

We will paint the millet yellow.

Glue the colored millet onto the tail at the green dots.

Glue small twigs and mung beans on top of the head.
Glue it where the eye should be.

Let the glue dry.
The composition is ready.


Tail close up.

“Firebird” from the side.


“Fire bird” made from dried autumn leaves. Master class with step-by-step photos
It is advisable to collect leaves for the composition in warm sunny weather. So that there is as little moisture as possible outside. The collected leaves can be dried in old books. Place an autumn leaf between the sheets of the book, laying out the leaves in one layer. Do not stack leaves on top of each other, otherwise they may stick together. You need to put a press on the book, usually two bricks. After two weeks, the leaves are ready for use.
It is advisable to store dried leaves in boxes or envelopes in a dry place.
The leaves keep well and you can collect a large number of beautiful leaves and use them in compositions several years later.

To complete the composition you will need the following tools and materials:
- dry leaves of different colors and shapes,
- dry rose petals,
- PVA glue,
- scissors,
- white cardboard.

On white cardboard we will draw the outline “Firebirds”.

Glue the longer leaves onto the “Firebirds” outline tightly to each other.

Glue leaves of a different color and smaller size on top.

Glue the next row, the leaves are the same as in the first row, but narrower in size.

We will shade the wingspan with yellow leaves, gluing them tightly to each other.

Using leaves of a darker color, we will glue the edging of the wings.

After cutting off the leaves, lay out the neck of the bird.

Cut a triangle out of a brown sheet and glue the beak.
Glue the head in a circle of yellow leaves.

Cut out drops from rose petals and glue one drop onto each leaf.

Cut out circles from yellow rose petals and glue them into each drop.

Let the glue dry.

Glue a tuft of green leaf onto the head, glue an eye by cutting out a circle from a rose petal.

The composition is ready.

Wing close-up.

Tail close up.


“Heat bird” made from seeds and cereals. Master class with step-by-step photos
It is advisable to wash and dry the collected fruit seeds. Can be stored in bags.

To complete the composition you will need the following tools and materials:
- pumpkin seeds,
- melon seeds,
- seeds of watermelon,
- flower seeds,
- millet groats,
- mung bean cereal,
- chickpeas,
- pistachios,
- PVA glue,
- black cardboard.

On black cardboard we will draw the outline “Firebirds”

We will seal the fragment on the wings in the form of an arc with millet.

Cover the bird's head with black flower seeds.

Cover the top of the neck and the outline of the wings with melon seeds.

We cover the outline of the wings from below with pistachio scales.

Place five pumpkin seeds on the tail. Draw a drop of PVA glue around the pumpkin seed and cover it with millet. Let the glue dry.

Glue the seeds of the dawn flowers at the base of the drop fragment.
In the wings, between the arc of millet and the pistachio scales, glue mung bean groats evenly.

Between the wings of the bird's body we glue brown flower seeds.
Decorate the mung bean tail with green stripes.

Cover the outline of the tail with melon seeds. Between the drops on the tail we glue a flower made of two watermelon seeds, the middle of the flower is mung bean.
Master Class. Application from dry leaves “Bird”
Head: Victoria Aleksandrovna Ostanina, teacher of preschool education school No. 53 “Silver Hoof”
Each of us sees the world differently. Allow your child to create, and he will exceed your expectations!! Children have so much imagination! The teacher’s task is to support the child in his endeavors, to push him on the right path, to give him the opportunity to express himself. Manual labor is useful and exciting. Applique of dry leaves is a very interesting activity. Create with your children, make the world brighter!
Target: teach children to make appliques from dry leaves.
Tasks:
Learn to work with dry leaves;
Promote the development of children's imagination;
Develop accuracy in manual labor classes.
This master class will be useful for kindergarten teachers working with children of middle and high school age (children 4-6 years old).
For work you will need the following materials: colored cardboard, colored paper, glue, scissors, pencil, dry leaves of various shapes, feather, twig, maple fruits.

Progress
Educator: Hello guys! Creativity is an amazing process! It allows us to make something beautiful out of almost nothing! I suggest you make a picture from what lies under our feet!!! These are dry leaves, a twig, a feather…. And the result will surprise you! Begin?
The children answer.
Educator: Listen, please:
Oh, how many birds there are in the world:
Parrots and tits,
Kingfishers and crossbills,
Pelicans and blackbirds.
There are magpies, sparrows,
There are flamingos and nightingales.
Pigeons, cuckoos,
Little warblers.
Crow, falcon and owl
(she sits in the hollow during the day)
The woodpecker is knocking on the trunk,
A quail is calling in the field.
You know, there are so many of them!
We can't count them all!
They make us happy with singing
And wild plumage!
Educator: That's how many birds there are in the world! Today we will make birds. Each of you will make your own bird. But let's discuss what every bird has?
The children answer.
Educator: Each bird has a body, a head, wings and a tail.
And so mischievous eyes and a sharp beak. Birds fly and sit on branches.
Think a little about what kind of bird you will have and let's get to work.
1. Take a sheet of colored cardboard, for example blue.

Now we will glue a branch on which the bird will sit.

You need to hold the twig so that it sticks.

2. Now we will make the bird itself. We need a set of leaves like this.

Gently spread the back side of the largest sheet - this is the body,

and paste it onto the background. Now we do the same with the leaf, which will be the head of our bird.

Now let's make a ponytail. We smear 2 long leaves. Glue it.

Now let's move on to the wing.

So our bird is ready.

Autumn is not only cloudy days and raindrops that constantly drum on the windows and roof, but also a time of bright colorful landscapes. During a normal walk. which takes place in a city park or public garden, it is easy to assemble a whole collection of materials of various sizes, shapes and colors (yellow, brown, green, red, orange), with the help of which craftswomen, and even children, create crafts from tree leaves with their own hands for gifts or home decoration, interior decoration, for school exhibitions, presentations for Teacher's Day or the autumn holiday.
Step-by-step instructions for crafts for children using tree leaves
The variety of forms, and along with them the stunning colors of autumn leaves, make it possible to create many compositions, ekibans, herbariums, appliqués and crafts. If we talk about subjects, birds, zodiac signs, fairy-tale creatures, animals, decorative elements and jewelry are considered popular. It is especially interesting to involve a child in such creativity, because creating masterpieces develops his imagination and creative potential. Use the following step-by-step instructions to teach your child how to create fun DIY crafts.
Volumetric applique Owl from birch leaves
To create an owl, birch leaves are best suited; they are small in size, have an even contour, due to which they easily fit into the drawing making it three-dimensional.
Required materials and tools:
- album sheet of white cardboard;
- stationery scissors;
- birch leaves;
- simple pencil;
- black buttons or toy eyes;
- PVA glue;
- 1 sheet of white, black, red paper.
Step by step execution:
- To begin, draw on cardboard or print out the silhouette of the future owl.
- Next, carefully cut out the cardboard bird.
- Visually divide the owl into horizontal rows, apply glue to each one in turn and lay down the leaves. It is recommended to start gluing the sheets from the bottom row, gradually moving up to the top row until we have completely covered the entire owl. Lay the leaves overlapping each other.
- For the eyes, take white paper, cut out two circles, and glue them onto the owl with glue. We use black buttons as pupils, which need to be attached to the paper eyes with glue.
- We use red paper for the legs and beak, cut them out, and glue them to the owl with glue.
Autumn craft hedgehog made from pine cones and leaves
Not only leaves are used for crafts, other natural materials are also added to them - chestnuts, cones, acorns. Try making a funny hedgehog with your child. Necessary materials:
- Pine cones;
- plastic bottle (0.5 or 1 liter);
- stationery knife;
- a piece of thick cardboard;
- brown plasticine
- glue "Moment";
- two bottle caps;
- black acrylic paints.

Progress:
- It is advisable to take a bottle of a dark color (brown or black); if this is not available, a transparent one will do, but then it must be completely painted with acrylic paints.
- We attach the bumps to the painted bottle using glue, starting from the back of the future hedgehog. Make sure that the cones are firmly fixed to the bottle. We cover the entire bottle with cones, except for the “face” and “tummy” of the future animal.
- When the hedgehog’s body is ready, we move on to creating a nose - to do this, we paste the bottle cap with brown plasticine.
- For the eyes, we take two white bottle caps, in the center of which we draw pupils with acrylic paint.
- Glue the finished eyes to the muzzle with glue.
- The craft is almost ready, all that remains is to decorate it. To do this, spread the moss on a piece of cardboard and place the hedgehog on it.
- Place leaves and rowan berries on the back of the animal.
Composition of leaves Firebird
With the help of autumn leaves, children's fairy tales can come to life in original compositions. For example, we suggest trying to create a Firebird. Required materials and tools:
- a piece of white cardboard;
- yellow and black acrylic paints;
- PVA glue;
- red and green maple leaves;
- scissors;
- birch leaves;
- stems with ash leaves;
- stems with leaves of white acacia;
- birch leaves;
- simple pencil;

Step by step execution:
- Draw a silhouette of the Firebird with a bushy tail on cardboard and cut it out. Paint the body of the bird up to the tail with yellow acrylic, and draw an eye in black. Wait until the paint dries.
- Then we start decorating the Firebird, starting from the bottom of the tail. Apply glue to a strip of cardboard tail and tightly fasten the golden ash stems.
- In the next layer, a little higher, we glue a row of red maple leaves, 3rd row - green maple leaves, fourth - birch leaves, fifth - green maple, sixth - white acacia stems, seventh - birch leaves, the final row - red maple leaves.
- When the tail is ready, we begin to create the wing. Again we begin to attach the leaves with glue from the bottom row in the following sequence - ash stem, red maple leaf, green maple leaf, birch leaf, red maple leaf.
- The fabulous Firebird is ready!
Tree leaf mask
For a children's Autumn party in kindergarten or school or a masquerade ball, make an original mask with your child. You will need:
- maple leaves of different sizes;
- cardboard;
- strong rope, ribbon or elastic band;
- stationery scissors;
- glue;

Step by step execution:
- Draw a blank for the mask on a cardboard sheet and cut it out along the contour.
- Make small cuts along the edges of the mask and tie a thread so that in the future the product will stay well on your head.
- Glue the cardboard blank with glue and leaves. Start attaching the large leaves around the edges first, and the small ones in the middle.
Vase of autumn leaves
Autumn leaves are used not only to make children's crafts, but also to decorate home interiors. We offer to make an original vase for sweets or fruits. Necessary tools and materials:
- PVA glue;
- balloon;
- petrolatum;
- glue brush;
- scissors;
- Maple leaves.

Step by step execution:
- We inflate the ball to the required size, the more capacious the vase is needed, the larger the ball will be.
- To ensure that the leaves are well behind the ball, before work we lubricate it with Vaseline.
- For convenient work, we fix our ball in any container and begin to make a vase.
- Using a brush, generously coat each maple leaf with glue and apply one by one to the inflated ball.
- Lay out several layers of leaves.
- Once again, completely coat the almost finished product with glue and wait until it is completely dry (48-72 hours).
- Then deflate the balloon.
Photo frame
All children love to decorate the walls of their room with photographs or hand-drawn pictures. Help place your child's favorite photo in an original, homemade frame. Necessary materials:
- cardboard;
- glue;
- leaves;
- simple pencil;
- scissors.

Step by step execution:
- Prepare a cardboard frame of the required size. Make the middle of the frame (where the photo will be) a little smaller than the photo.
- Before decorating the frame, dip the leaves in hot water, they will become soft.
- Next, use PVA glue to glue the frame with leaves.
- Place the finished craft under a stack of heavy magazines or books. We are waiting for the frame to dry.
- We insert our favorite photo into our composition, securing it at the back with tape.
Applique Lion and fish on paper made from dry tree leaves
Colorful and bright applications are obtained if whole leaves are used for their preparation. Children love to create different animals and birds - a bunny, a fox, a horse, a cockerel, a cat, a dog, etc. We suggest making a funny lion cub and fish. Required materials for the lion:
- yellow linden leaves;
- black felt-tip pen or marker;
- ash seeds;
- horse chestnut fruits;
- PVA glue;
- dry pine twig;
- scissors;
- yellow colored paper;
- orange cardboard.
Step by step description:
- Print or draw a lion's head on yellow paper and cut it out.
- Glue the mane in a circle using glue in several rows with linden leaves.
- Use a black felt-tip pen to paint over the lion's nose and glue one chestnut to it with glue.
- We use needles from a dry pine twig as antennae for the lion.
- The tongue will replace the ash seed glued with glue.
- When the product dries, the craft will be ready.

Necessary materials for the fish:
- yellow linden leaves;
- PVA glue;
- brown quince leaves;
- marker;
- ash seeds;
- acorns;
- stationery scissors;
- blue colored paper.
Step by step description:
- Print the fish template on blue paper or draw it with a marker and cut it out with scissors.
- Cut a stalk from each linden leaf and use glue to attach them to the frame in the form of fish scales.
- Glue a few quince leaves onto the tail of the applique and decorate with ash seeds.
- Attach the acorn caps to the fish using glue along the line of the head. Your DIY tree leaf craft is ready!
How to dry leaves for crafts
Dry leaves are an excellent free raw material for various herbariums, applications, and crafts. In order for your crafts to last for a long time, you need to learn how to properly dry leaves. To do this, study these rules:
- Collect natural material only in dry weather.
- Choose leaf color yellow or green.
- Pay attention to the appearance of the leaves. The most suitable ones will be smooth, beautiful and clean, without damage or black spots.

There are several options for drying leaves. Let's look at each:
- Long-lasting and high-quality method (takes 14-30 days). Carefully level each leaf and place it between the pages of the notebook, which must be placed in a large thick book. Weigh the book on top with something heavy.
- Accelerated. If you didn’t have time to make the preparation, but you already need leaves for tomorrow, this method is the most suitable. Place the leaves between the newspapers and iron them with a warm iron 3-4 times. Then let the plants cool and repeat the procedure several more times. It is worth saying that when using this method, the plants become fragile and cannot be stored for a long time, the green leaves immediately darken, and the yellow ones remain bright.
- Alternative. Some craftswomen have gotten used to preparing leaves using a hairdryer. They claim that with this method the plants do not darken, but there is a chance that the leaves will curl into a tube.
Head: Elvira Gadelkhanovna Musina, teacher at the preschool educational institution MBOU preschool educational institution CDTT “Biktyrysh”, Ufa
Pupil: Musina Adelina, 4 years old, pupil of the Biktyrysh Children's Children's Education Center
Explanatory note.
Autumn is a wonderful time! She is not only beautiful, but also rich, generous with gifts, just have time to receive them! Multi-colored leaves, seeds of different shapes, bright berries - use your imagination! So I don’t pass by this beauty, I collect everything that the beautiful Autumn gives us!
AUTUMN-FIREBIRD
Autumn-Firebird flapped its wings,
Everything lit up with colored lights:
Tree crowns, bushes and paths,
Grasses in the fields and dewdrops on the grass,
And the clouds over the overgrown river,
The water in the river also became colored.
The colors play, caress, call.
The colors of autumn sing hymns.
I bring to your attention a panel made of seeds, leaves and berries, easy to make and original! (photo ris1.jpg)
This work can be done with children of preschool and school age. Using a finished picture, preschoolers gain the ability to smear plasticine and work with natural materials, while older children can complete the work themselves with their own hands.
Target— production of the painting “Autumn - Firebird”.
Tasks:
1. teach how to work with plasticine and natural materials;
2. consolidate skills - smearing plasticine over a drawing;
3. instill aesthetic taste, respect for nature, accustom to accuracy and attentiveness.
Equipment: cardboard, pencil, eraser, plasticine and natural materials - seeds of various trees, rowan fruits, leaves.
.jpg)
.jpg)
Progress
1. Draw a bird or a tree branch with a pencil.
.jpg)
2. Roll small balls of plasticine. We begin to smear the plasticine with a layer of 2-3 mm.
.jpg)
First - the head of the bird, then the body, tail and wings. At the end we form a tree branch on which the bird sits (photo ris6.jpg).
.jpg)
3. Prepare the seeds for work. We separate them from the branch.
4. We begin to attach the seeds from the bird’s tail upward, pressing them into the plasticine.
.jpg)
5. Place the second layer of seeds exactly on half of the first layer, covering it.
.jpg)
6. In this way we reach the neck of the bird and make wings, starting to attach seeds from the tips of the wings.
.jpg)
7. We make a beak from two seeds, attach a rowan eye to a piece of plasticine, and make a crest for the bird on top.
.jpg)
8. Attach the branch. You can decorate a tree branch with rowan fruits, which will give the picture bright colors.
.jpg)
10. Children understand the technique of work, and they do it with pleasure.
Bottom line.
During this work, the child learns to be neat, attentive, and work with plasticine and natural materials; develop fine motor skills; We instill respect for nature and aesthetic taste. Adeline really liked it, and we came up with new paintings with natural materials of golden autumn.

"Firebird"
Autumn is a wonderful Firebird,
Arrived just before dawn.
I wasn't afraid to go down
In the palm of September.
I recognized her by her color -
There are no brighter colors in the world.
This bird was sent to us
Gods of fairy planets.
Chorus:
Firebird fiery autumn,
Don’t get caught in the snare of despondency,
Don't hit the ground with slanting rain,
The forest landscape is more wonderful than Gzhel,
How long will this grace last?
Firebird autumn, really?
Are you going to fly away?
I'll take a walk where the maples are,
In a leafy snowstorm.
Leaf scorched by the Firebird,
I'll save it as a keepsake.
This is the backstage of fairy tales,
Quiet forest like the Garden of Eden -
Gilded leaves
Like feathers circling.
Chorus:
Firebird fiery autumn,
Don’t get caught in the snare of despondency,
Don't hit the ground with slanting rain,
Soar up with the fire of the fire.
Autumn is a time for exciting experiments with natural materials: leaves, cones, twigs, rowan berries, chestnuts, acorns and other gifts of nature. Leaf crafts are perhaps the most popular creative activity with children for autumn days. We offer a simple master class on making a three-dimensional panel “Firebird”.
For work you will need: yellow leaves, gold, silver and red acrylic paint (you can take other colors, but always acrylic), brush, thick glue (PVA is possible, but it is safer to use a glue gun), corrugated cardboard, fabric, large stapler, flexible cardboard, scissors, needle and thread.
Step 1: Making the Background
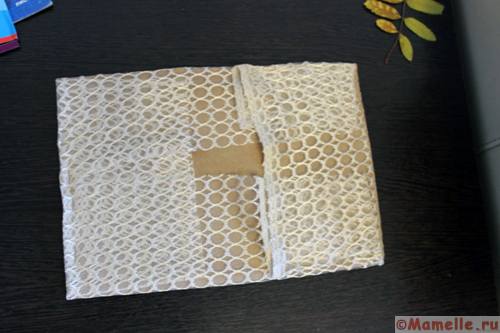
Cut out the base for the panel from corrugated cardboard. It can be of any shape, for me it is an A4 rectangle. Cover the base with fabric, securing its edges on the back side with a stapler. 
Step 2: Making the Bird's Tail
Select leaves that are suitable in size and shape and place them on the base the way they will look in the final work. Then take the leaves one at a time and carefully paint them with acrylic. You can paint not all the leaves, but only some, to preserve the charm of natural autumn tones. Let the leaves dry completely. 
Step 3: Glue the tail to the base
My son and I decided to use a glue gun, which allows us to apply a very thick layer of hot glue, and thus securely connect all the branches of the “tail”. Unfortunately, I only had black glue, but it turned out to be fixable: we then painted over the blackness with gold paint. Squeeze a large puddle of glue into the base of the tail and place two or three dots on the end of each leaf. Arrange the leaves as intended and press well. Let the glue harden.

Step 4: Making the Bird's Body
To create the effect of volume, we cut out a figure from flexible cardboard and sewed it with four stitches to the base of the picture. Like this: 


All that remains is to paint the bird’s body, draw or glue its eyes, and decorate its beak. The cute bird is ready!


This is a very simple option, doable for an elementary school student in everything except using a glue gun (this is the work of an adult). But you can complicate or diversify this master class with your own ideas.